


User Manual
Audience & Purpose of the Document
This document is intended for the users who are interested in utilizing Rajdharaa - RIICO application and functionalities available in it. This document is useful for all the users who wish to know how they can:
- Find the location of the industrial areas based on selected districts, Industrial Area Category and 'Category of Industries Allowed-EIA Notification 2006'
- Filter Industrial Areas based on Category, Total Area (Raw Landbank), Plot Area (Upcoming Industrial Area) , Vacant Plot (Industrial Area open for allotment) and 'Search By Plot Occupancy (%)' (Upcoming Industrial Area and Industrial Area open for allotment), Search Plots in searched and selected industrial areas based on Plot Status, Road Width, Plot Preferences and Plot Area (Sq.)
- Search blocks based on predefined queries.
- Department users have the priviledge to merge or split plots using the application
- Change the base map to view a different background, or visual context, for the data in a map and turn on/off the layers to view layer data.
- Search Nearby Industrial Areas, Educational Institution, Medical, Financial Institution, Community Service, roads and other facilities within predefined distance from selected location on map.
- View directions from the location specified on the map (source to destination).
Introduction - RIICO Application
- RIICO application is meant for viewing and querying the location of all the industrial areas of the 3 major categories namely: Industrial Area open for allotment, Upcoming, Undeveloped land available for allotment and Raw Landbank under the RIICO department of Rajasthan.
- Department users can also split and merge plots in the application
- Other useful information such as direction search from one location to another , other facilities including industrial areas within defined distance on map, etc. can be obtained on using this application.
- Note: RIICO application can be accessed on LAN/WAN/internet browsers (Internet Explorer 11.0 and above, Google Chrome, Mozilla etc.)/ Intranet/Local.
Login
- RIICO web application is open to both public as well as to department users and editors. But certain priviledges have been given to the department user and editor user roles
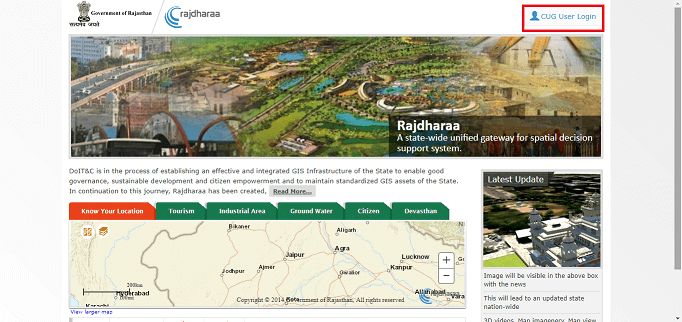
- RIICO web application can be accessed by typing gis.rajasthan.gov.in/riico on web browser. The users can also pass the URL rajasthan.gov.in, and get redirected to official page of the Rajasthan Government.
- In order to login, users can click on the login button available on the Home page or click on CUG User Login on Rajdharaa home page.
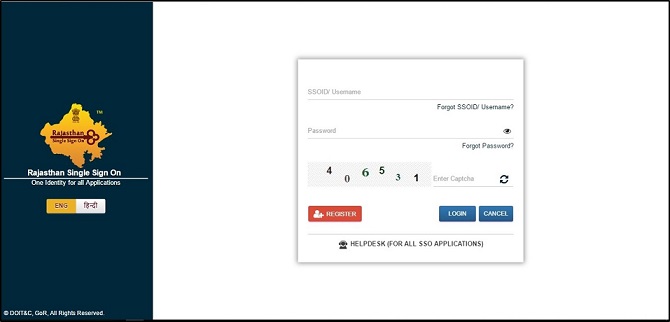
- On clicking SSO Sign In, user is redirected to the Single Sign In page.
- Once registered, the user can enter registered SSO ID, Password, and unique 6-digit Captcha code to login and access all Rajdharaa applications.
- In case, you are a first-time user, click on Register button.
- The user can also generate their forgotten SSO IDs and Passwords by clicking on Forgot Username/SSO ID or Forgot Password links respectively.
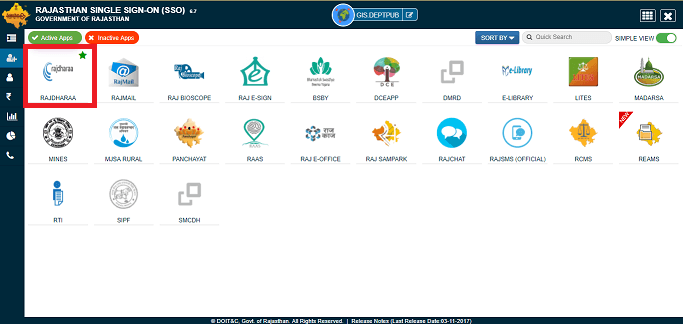
- Upon successful login, the user gets redirected to the Rajasthan SSO (Single Sign On) page.
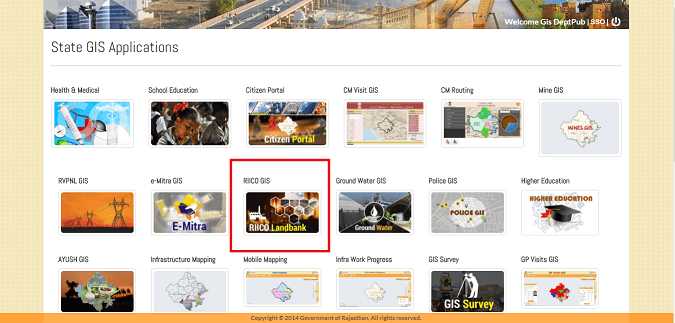
- Click on 'Rajdharaa' thumbnail to reach the State GIS Application page.
- Click on 'RIICO GIS' thumbnail to reach the RIICO application home page.
- Note: Rajdharaa Home page can be accessed by typing gis.rajasthan.gov.in on web browser.
Home Page - RIICO Application
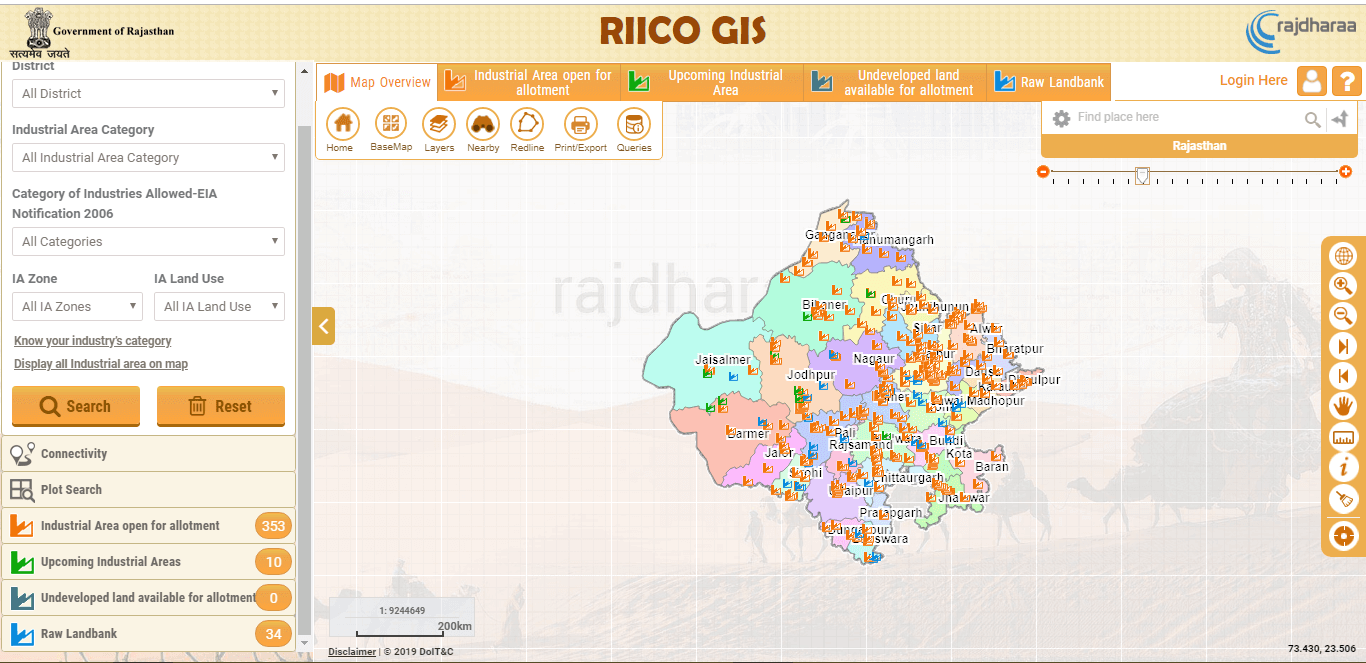
- On successful login, user is navigated to the home page of the RIICO application.
- The application loads displaying the industrial areas of the state at full extent along with the Advance Search options on the left panel and tabs on the top part of the screen lists out the overview map and the details of the Industrial Areas based on their categories. The user can navigate to the Mappage from the Industrial Area open for allotment, Upcoming Industrial Area, Undeveloped land available for allotment and Raw Landbank tabs.
Map Page - RIICO Application
- The user can navigate to the map page by clicking on the "Map Overview" button
- The application display to the industrial area selected from the home page.
- The Search Tool is open by default. The values are populated in the tool based on the selection in the Home Page
- All the tools on this page are the same as the ones on the Home page except the search tool. The search tool has the same functionality as the avdvanced search tool in the Home page.
.png)
 Advanced Search
- The user filter the number of Industrial areas displayed on the basis of category, area, name, zone, plot occupancy etc
- The application shows the Industrial areas which satisfies the criteria selected by the user.
- The tool is available in the left panel of the Home page and the same features are available in the Search Tool in the Mappage.
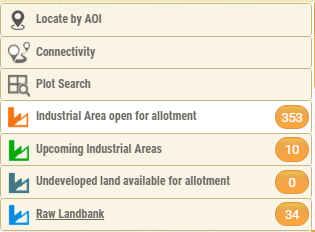
- There are seven tabs on the left panel: Locate by AOI, Connectivity, Plot Search, Industrial Area open for allotment, Upcoming Industrial Areas, Undeveloped land available for allotment and Raw Landbank
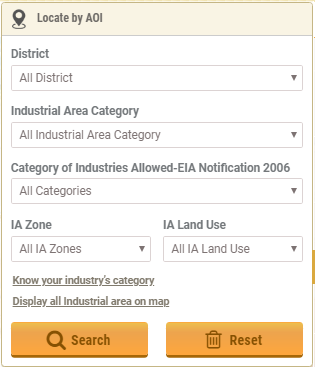
Locate byAOI:
- The user can select the industrial areas on the basis of district it is located in, the category, EIA Notification Category etc.
- The other panels are filtered as per the selection in this panel
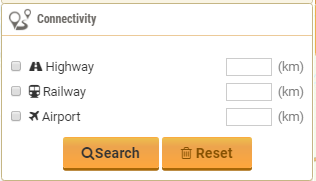
Connectivity:
- The user can search the industrial areas on the basis of within define distance in ‘km’ of connectivity such as Highway, Railways and Airport for the selected district
- The other panels are filtered as per the selection in this panel
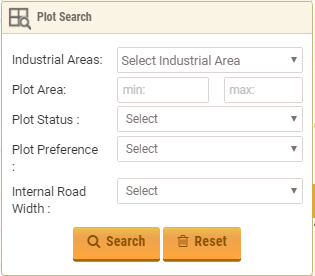
Plot Search:
- The user query on a plots in a particular area based on their Industrial Area, Land USe, Plot Status, Plot Type, Road Width, Preference, Area etc.
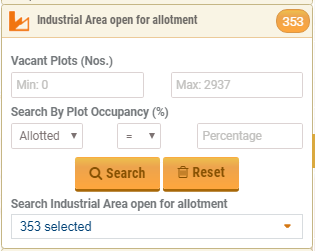
Industrial Area open for allotment:
- The user can filter the Industrial area in this panel based on the total number of vacant plots, Percentage Occupancy or select the industrial area by their name
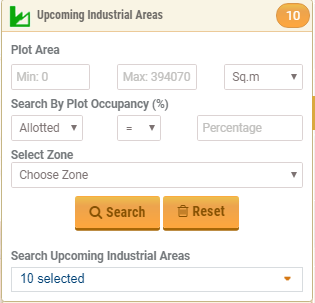
Upcoming Industrial Area:
- • The user can filter the Industrial areas in this panel based on the total plot area of the Industrial Area, Percentage Occupancy, Zone or select the industrial area by their name
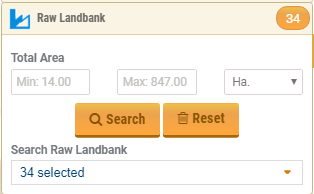
Raw Landbank:
- The user can filter the raw landbanks in this panel based on the total area of the Industrial Area or select the landbanks by their name
Navigation Tools
- Navigation Tools are one of the primary ways of interacting with geographic information available on the application.
- Use the navigation tools available with the Navigation toolbar for map navigation and querying.
- The Navigation Tools are available on the Navigation toolbar as illustrated below:
.png)
FULL EXTENT:
- Allow users to zoom to the full extent of map of Rajasthan.
- Click the Full Extent icon
 on the toolbar to view the full extent of map of Rajasthan.
ZOOM IN:
- Allows user to zoom in to a geographic window by clicking a point or dragging a box.
- Click the Zoom In icon
 on the toolbar, click a point or draw rectangular envelop over the map to view map at smaller scale.
- Note: Previous View button enables only after Zoom-In.
ZOOM OUT:
- Allows user to zoom out from a geographic window by clicking a point or dragging a box.
- Click the Zoom Out icon
 on the toolbar, click a point or draw rectangle over the map to view map at a larger scale.
NEXT VIEW:
- Allows a user to go forward to the next extent.
- Like the forward buttons on an Internet browser, this tool step forward through the trail of recently used map extents.
- Click the Next View icon
 on the toolbar to view Next Extent.
PREVIOUS VIEW:
- Allows user to go back to the previous extent.
- Like the backward buttons on an Internet browser, this tool steps backward through the trail of recently used map extents.
- Click the Previous View icon
 on the toolbar, to view Previous Extent.
 - On clicking the Previous View map returns to previous smaller scale.
- Note: At full extent, Previous View button gets disabled.
PAN VIEW:
- Allow user to pan the map view without changing the scale.
- Click the Pan View icon
 on the toolbar, move the mouse pointer over the map display, click and drag the pointer in the desired direction (Up, Down, Left and Right) to view the map.
MEASUREMENT:
- Measure lines, areas and get measurement information in the predefined units of measurement.
- Click the Measurement icon
 to open the Measurement window.
.png)
Area:
Click once on the Area icon  to activate the Area measurement tool, clicking once again will toggle the tool to deactivate state.
- Select the Area measurement unit.
- Sketch the polygon by mouse clicks over the map and double-click to complete the polygon.
- The measured results display in Measure window.
.png)
.png)
.png)
Distance:
Click once on the Distance icon  to activate the Distance measurement tool, clicking once again will toggle the tool to deactivate state.
- Select the Distance measurement unit.
- Sketch a polyline by clicking over the map and double-click to complete.
- The measured results display in Measure window.
.png)
.png)
.png)
Location:
Click once on the Location icon  to activate the Location measurement tool, clicking once again will toggle the tool to deactivate state.
- Select the desired Location unit.
- Click at the desired location over the map.
- The latitude and Longitude values of the user clicked point and mouse location will be displayed under the Measurement Result of Measure window.
.png)
.png)
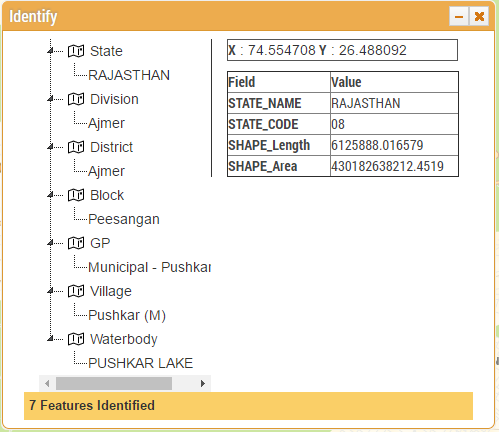
IDENTIFY:
- Provides attribute information of the POIs at the user clicked geographic location.
- Click the Identify icon
.png) on the toolbar, click the mouse pointer over the map POI you want to identify.
on the toolbar, click the mouse pointer over the map POI you want to identify.
CLEAR RESULTS:
- Allows user to clear all or any facility graphics created on map after execution of any available tool(s) on Devasthan application.
- Click on Clear Results icon
 to clear available graphics on map.
ZOOM TO CURRENT LOCATION:
- Allow user to view its current positional location in the view.
- Click on Zoom to Current Location icon
 so that the map navigates to the Internet Service Provider (ISP) positional current location with defined icon.
FIXED ZOOM:
- Changes the extent in fixed levels to display more or less information.
- Click on "+" or "–" or slider to zoom in or zoom out the map at fixed level.

RIICO Tools
Tools available on RIICO application are as displayed below. These tools are explained in detail in the subsequent sections of this document. All the tools are available on both the Home page as well as the Map page.
.png)
Other tools available on RIICO application are:
.png)
.png)
Home
- Hover the mouse on Home icon
 and click to access the rajdharaa dashboard.
 - Click the Home icon on the main toolbar will redirect the user to the rajdharaa dashboard.
 Basemap Gallery
Base map is a non-editable layer that is provided in the background only for reference information. It is typically designed to provide a visual reference for other layers to help orient the user.
- Hover the mouse Basemap icon
 and click.
 - Click the Basemap to open the Basemap Gallery and click on any of the available thumbnail to set it as reference basemap on map page.
.png)
 Layers
RIICO layers like industrial Landbanks, Head offices, GSS lines, Waterbodies etc are provided in the application. Layers higher in the table of contents are drawn on top of those that are lower.
- Hover the mouse on Layers icon
 and click.
 - On the Layers window, check or uncheck to turn the layers On or Off.
- Click on the "+" or "-" sign to view or collapse the symbol and the layer properties (scale dependent display) respectively.
- By default, all the layers are not enabled. A layer will be visible on the map only when it is enabled.
- The District boundary layers enables at different scales and zoom level.
.png)
Search Nearby
Search Nearby tool has the facility to search the nearby industrial areas andfacilities (School, Higher Education, Technical Education, Medical & Health etc.) through various options such as using 'Locate Current Location', 'Locate Other Location', 'Locate POI Location'
- Hover the mouse over Search Nearby icon
 and click.
 - User is required to set the distance in Km and find the nearby facilities using any one of the following options.
.png)
.png) Search Nearby: Using this option, user can search the nearby facilities within specified distance.
Search Nearby: Using this option, user can search the nearby facilities within specified distance.
.png) Current Location: Using this option, user can search the nearby facilities from the current location to within specified distance.
Current Location: Using this option, user can search the nearby facilities from the current location to within specified distance.
.png) Locate other Location: Using this option, user can search the nearby facilities within specified distance. by choosing any point by clicking on the map.
Locate other Location: Using this option, user can search the nearby facilities within specified distance. by choosing any point by clicking on the map.
.png) Locate POI Location: Using this option, user can locate the required POI location.
Locate POI Location: Using this option, user can locate the required POI location.
.png) Clear Results: Using this option, user can clear the search nearby results.
Clear Results: Using this option, user can clear the search nearby results.
Selected Area:
- Select the Facilities as per your choice by choosing the options from the Dropdown.
- Specify the distance (For example: 10 Km) to search nearby facilities.
- Specify the target point and it will search the nearby facilities from the set point location to within specified distance.
- Total number of facilities gets searched and is shown as result.
- Click on one of the facility type (For example: Hospital) and it will show the total number of facilities both on the tool and on map.
- From the tool the user can click on each facility to highlight it on the map. The user can also zoom on the facility and/or create routes.
Merge/Split
Merge/Split tool facilities user to merge two or more existing plots into one plot and split single plot into one or many as per the user requirements.
- Hover the mouse over Merge/Split tool icon

- Click on Merge/Split tool to open ‘Merge/Split’ widget.
.png)
On opening ‘Merge/Split’ widget, focus is on ‘Merge/Split’ tab.
Other tabs available on ‘Merge/Split’ widget are :
- ‘Split Plot’ tab.
- ‘Log’ tab.
Merge Tab:
- Open ‘Merge/Split’ widget and single click on ‘Search by Transaction No:’ dropdown to display all the plots which request for merge is generated.
- Select any of the available options in ‘Search by Transaction No:’ dropdown.
- Map navigates to the selected plot and displays as highlighted on map as shown below.
- Plot detail is displayed in tabular format as shown below.
- Click on ‘Merge’ button to merge the listed plots.
- Log details of the merged plots should display in ‘Log’ tab.
.png)
Split Tab:
- Single click on ‘Split’ tab top display the controls available on ‘Split’ tab.
- Single click on ‘Search by Transaction No:’ dropdown to display all the plots which request for split is generated.
- Select any of the listed transaction number to zoom and highlight the split feature on map.
- Plot details are displayed in tabular format.
- It should work for all kind of four sided plots.
- However, application provides user to split the plot based on the availability of road on the plot. Single side of the plot is on road side, and then only single radio button should be available.
- If all sides if the plots are having road then all plots should be accompanied with radio button.
.png)
Log Tab
- Single click on ‘Log’ tab top display the controls available on ‘Log’ tab.
- ‘Log’ tab facilities user to filter log details based on ‘Merge/Split’ process, there status (Success/Failure), ‘Transaction No.’, ’Plot No’ and ‘Duration’.
- All the dropdowns are dependent on each other and data on each dropdown should filter based on selection of option from any other dropdown, provided options for the selected options are available.
- Example, click on ‘Select Transaction No.’ dropdown to view the transaction numbers for which ‘Merge’ process is executed.
- Select any of the available transaction number in ‘Select Transaction No.’ dropdown.
- Merge records for the selected transaction filters and display in tabular format.
- Click on ‘Zoom’ to highlight and display the merged feature on map.
- Single click on ‘Select Status’ dropdown to check the status of the selected transaction.
- If the merge operation of the selected transaction is ‘Success’ then only ‘Success’ operation displays in the dropdown.
- For single transaction number the status can be either be ‘Success’ or ‘Failure’.
- Similarly, ‘Transaction No.’ can be filtered based on selection of ‘Status’.
- ‘Plot number’ dropdown filters based on selection of Transaction No. or Status.
- Similarly using the duration date pickers, user can filter records in the table.
- On selection of ‘Split’ option from ‘Process’ dropdown, records in log table changes.
.png)
Redline
Redline tool provides user to download, export and view the extracted area on Google Earth.
- Hover the mouse over Redline tool icon

- Click on ‘Redline/Markup’ widget tool to open the widget.
- Using ‘Redline’ tool, user needs to draw polygon inside an industrial area.
.png)
- Click on ‘Draw Boundary’ and if draw polygon outside industrial area. Error message displays.
- Using ‘Search’ tool, search Upcoming or Raw Landbank e.g. GHILOTH upcoming industrial area. The use can also zoom particular plot or search plot using ‘Plot Search’ panel on ‘Search Industrial Area’ widget.
- Click on ‘Draw Polygon’ and then click on map at three different locations on map. Double click to complete the draw process.User can draw multiple polygons on map and all can be exported to KML format.
- Edit the name of the drawn polygon
- Click on ‘Export to KML’ to export the area of the map extracted using ‘Draw Polygon’ functionality. Exported file can be loaded on Google Earth.
Print /Export tool provides user the facility to print or export the map along with scale and legends in predefined map template.
- Hover the mouse over Print tool icon

- Click the Print/Export Button on the main toolbar to open the Print/Export widget.
.png)
- Enter Title e.g. Map in Title textbox.
- Select layout A4 Landscape or A3 Landscape from Layout dropdown.
- Select format JPG or PDF from Format dropdown.
- Click on Print button.
.png)
Predefined Queries
Predefined tool provides user the facility to query on the blocks where industrial area or a particular type of industrial are is not available
- Hover the mouse over Queries tool icon

- Click the Queries Button on the main toolbar to open the Predefined widget.
.png)
- Select a query from the Select Query dropdown
- Click on Apply button
- The result is displayed in a tree structure. When the user clicks on an Admin node, the map zooms in to the selected admin boundary
.png)
Industrial Area Details and Reports
With the help of different type of Industrial area category tab such as ‘Industrail Area open for allotment’, ‘Upcoming Industrial Area’, ‘Undeveloped land available for allotment’,’ Raw Landbank’ available on home page along with Map overview tab, user can get the followings information related to any particular industrial area:

Industrial Area Details
User can get the detailed information of any industrial area by clicking any one of the four tab as shown above. For ex: by clicking on ‘Industrail Area open for allotment’ tab user will get the following information as shown below:
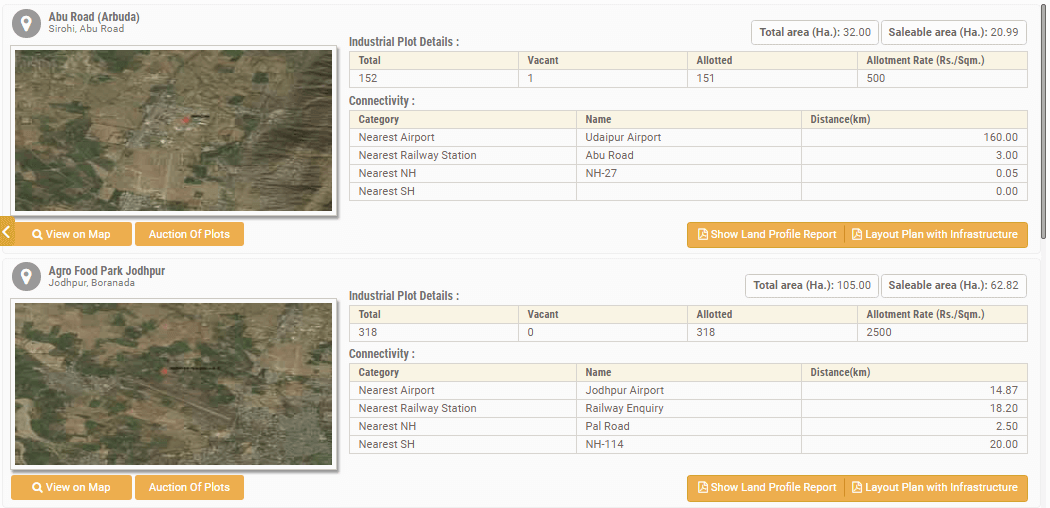
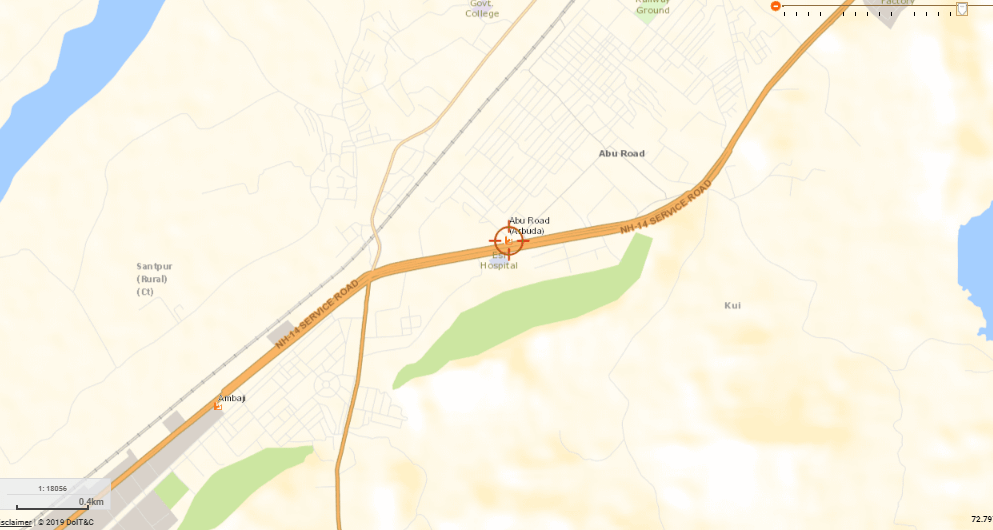
User can reach at the exact location of the industrial area on the GIS map by clicking on ‘View on Map’ tab
User can get the details of auction of plots details by clicking on ‘Auction of Plots’ tab

User can get the Show Land Profile Report by clicking on ‘Show Land Profile Report’ tab and this report can be exported and saved into pdf format by clicking on ‘Export PDF’ tab

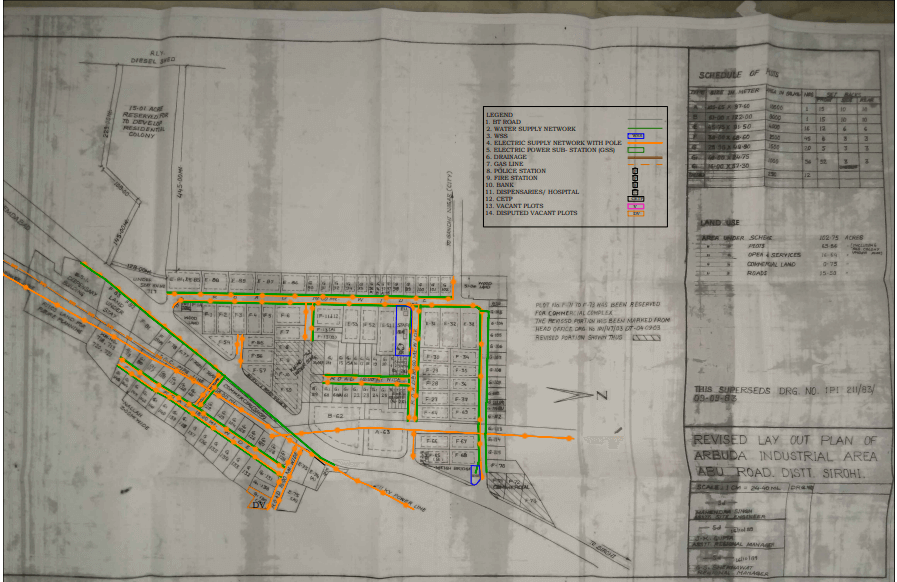
User can get the Layout Plan with Infrastructure document if pdf format by clicking on ‘Layout Plan with Infrastructure’ tab
Search Points Of Interest
Search provides user with an opportunity to look for a particular State, City, District, Block, Gram Panchayat, Village, and Points on a map.
To Search A POI
- The search text box is available on the top right side of the screen. Type in the search term, as you type, you may see words begin to appear below the search box, these are auto-suggestions that may match what you are interested in.
- As actual search result loads, click on the result to view location on the map.
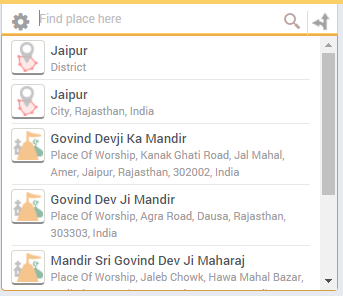
- As you type in the search term on the search textbox, you will see words begin to appear below the search box. These are locations that may have the typed substring match within their name.
- For example, if user types "Bik" on search POI, then auto suggestion list will populate with the search word "Bik" as "Bikaner" with the first three results being the admin boundary.
- If a user types in words, the words will be searched in the possible matches either together as a phrase or otherwise. For example, if the user types in "Tagore School" then the possible results can be Adarsh Vidya Mandir Tagore Central Academy School, Government Primary School in Tagore Nagar, etc.
- Space between two words typed will be unrelated in search of possible matches. For example, both Ram Bagh and Rambagh would be listed even when user types in any of the words (with or without space). Also, the special characters are ignored in the search.
- A user can also find the recently searched POIs in search POI.
- Also, user can search POI by pin code.
- The user can also search on the basis of numerous categories such Airport, ATM, Cinema, Coffee Shop, Museum etc. Type in the category name and the results from the category will populate as auto suggestions with the category icons showing for each category on the left panel. For example, if the user types in "Cinema" to search for cinema halls in Rajasthan, cinemas in the category will get populated.
- The user can type in a location and a service to be searched together. For example, user can search for a ATMs in Kota by typing in "KOTA ATM".
The user can also search for POI within a defined map extent. The map extent is the limit of the geographic area that can be seen on the map. The map extent can be changed by zooming and panning.
- Click on Location settings icon available next to the search box. Extent based search remains turned off by default.
- Turn the Extent based Search on through click.
- Now, define the map extent in which you would like to search by zooming and panning.
- Once done enter the text in search textbox. The search will get results only from the area as on the map.
- To search for locations from World, India & Rajasthan, click on Location settings icon available next to the search box. Rajasthan is the default selection for location setting.
- Click on India to mark the checkbox next to it and then search for any location within the Indian boundary.
- Click on World to mark the checkbox next to it and then search for any location in the world.
- Click on Rajasthan to again mark the checkbox next to it and then search for any location within the Rajasthan boundary.
.png)
Locating State
- The user can locate Rajasthan by default by typing in the search term in text box.
- To locate state in India, click on Location settings icon available next to the search box and click on India to mark the checkbox next to it. Now, search for an Indian State.
- Now, the user can type in the name of any state to search and view it highlighted on the map and related information on the left panel.
- The user can view the state searched for highlighted on the map.
Locating City
- The user can only locate cities within Rajasthan through default settings by typing in the search term in text box.
- To locate Indian cities outside the Rajasthan boundary, click on Location settings icon available next to the search box and click on India to mark the checkbox next to it.
- Now, the user can type in the name of any city to search and view it highlighted on the map and related information on the left panel.
- The user can view the city searched for highlighted on the map.
Locating District, Block, Gp, Village (Administrative Boundary)
- The users can search for Districts, Blocks, Gram Panchayats, and Villages within Rajasthan by typing in the search term in text box.
- Search and view Districts, Blocks, Gram Panchayats, and Villages highlighted on the map and related information on the left panel.
Locating Points
- The users can search for Location Points within Rajasthan by typing in the search term in text box.
- Search and view the location point highlighted on the map and related information on the right panel.

Find Routes:
- Click on Find Routes icon
.png) to open the Find Routes tool.
to open the Find Routes tool. - To know more about how to use the Find Routes tool, refer to section Directions.
 Directions
User can get directions and find route between two chosen destinations on Rajdharaa Devasthan application. Multiple destinations can be added to the route.
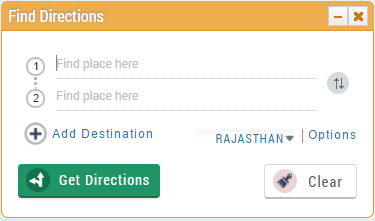
- Hover the mouse on Find Directions icon
 and click to open Find Directions tool.
- The user can select the Start point and End point by typing in the place name or by clicking on the map.
- Click on Start point search and type in your starting point location and then click on End point search and type in the End point location.
- Click on Get Directions button to view the route between two points.
- Total distance and estimated time required to complete the journey are available along with the route.
- The user can reverse the points (Start Point & Destination) by clicking on the Reverse Direction icon.
Add Stops by clicking on the Map or Modify Routes with Waypoints:
- Click on Add Stop/Modify Route Waypoints icon
.png) to view all the way points already available as white points on the way.
to view all the way points already available as white points on the way. - The user can now drag the way points to modify the route. Click on one of the way points and drag it to a different location to re-route.
- The user can click on the waypoint to view the information.
Add Destination:
- The user can add more than one destination for the route.
- Click on Add Destination button to add destination points on the route.
- Click and search for a destination on the destination textbox added.
- To change the order of your stops, click and drag the destination points on the map or drag and drop position points on the left-hand panel.
Return to Start:
- Mark the Return to Start checkbox for two ways routing, from start point to destination and back again to the starting point.
MI/KM:
- The user can click on Show More Options from the left-hand directions panel to select the measurement unit for distance (Miles or Kilometre).

Zoom to Full Route:
- User can click on Zoom to Full Route to view the whole route zoomed on the map area.
Print:
- Click on Print icon to open an HTML page with the searched directions.
- On the page click on Print button to successfully print directions for use.
Clear:
- To close all the route results and settings, click on Clear on the tool.